Raise your hand if you’ve ever turned in an essay, research paper, or lab report, feeling proud of your ideas—only to get it back with red marks all over the page. Grammar mistakes, punctuation errors, run-on sentences, or mix-ups like “their/there/they’re” that you swear you didn’t miss. Ugh, it’s the worst feeling ever. And the worst part? Those small mistakes can cost you 5-20% of your grade, even if your content is top-notch[1]. To make it worse, most paid grammar checkers are way too expensive for students—we’re already drowning in tuition fees, textbooks, and coffee runs, so dropping money on a tool just to fix commas feels impossible. That’s why I hunted down the best free grammar checker for students, and it’s completely changed how I submit my work.
Here’s the truth every student learns the hard way: Grammar errors don’t just make your writing look unpolished—they undermine your credibility[7]. Professors notice when you mix up verb tenses, use comma splices, or leave sentence fragments, and it signals that you didn’t proofread carefully[4][6]. But let’s be real: Proofreading your own work is hard. You’ve spent hours writing, so your brain skips over mistakes you’ve already seen a hundred times. A best free grammar checker for students is like having a free tutor who checks your work line by line—catching errors you miss, explaining why they’re wrong, and showing you how to fix them[1][8].
In this guide, I’m going to walk you through exactly how to use the best free grammar checker for students, step by step. I’ll share why it’s way better than just relying on spell check (spoiler: spell check misses most grammar mistakes!), show you how to use it for essays, research papers, and even lab reports, and teach you how to avoid common grammar pitfalls that trip up students. No tech jargon, no complicated steps—just real advice from a student who’s been in your shoes. By the end, you’ll be able to fix grammar errors in minutes, submit polished work, and stop losing unnecessary points.
Why the Best Free Grammar Checker For Students Is a Student’s Lifesaver
You might be thinking, “Can’t I just use the spell check in Word or Google Docs?” Trust me, I’ve been there—and spell check is not enough. It only catches spelling mistakes, not grammar errors like wrong verb endings, misplaced modifiers, or run-on sentences[3][6]. The best free grammar checker for students is built specifically for us, and here’s why it’s a game-changer:
• It’s 100% free (no hidden fees): Let’s be honest—students are on a tight budget. The best free grammar checker for students has no sign-up, no credit card required, no premium upsells, and no limits on how much you can use it[1][8]. It’s free forever, which is perfect for us.
• It catches more than just spelling: Unlike basic spell check, it catches grammar errors, punctuation mistakes, sentence structure issues, word choice mix-ups (like “affect/effect” or “its/it’s”), and even clarity problems[3][6][8]. It’s like having a proofreader who knows exactly what professors look for[4].
• It teaches you, not just fixes: The best part? It doesn’t just flag errors—it explains why they’re wrong and how to fix them[4][8]. So you’re not just fixing one paper—you’re learning to avoid those mistakes in future assignments. That’s way more useful than a paid tool that just corrects without explaining[1][9].
• It’s easy to use (no tech skills needed): You don’t need to be a tech whiz to use it. Just paste your text, wait a few seconds, and it highlights all the errors with simple fixes[2][5]. No complicated buttons, no confusing settings—just straightforward help.
• It’s built for academic writing: Generic grammar checkers are made for emails or social media, but the best free grammar checker for students understands academic writing rules[4]. It catches formal vs. informal language, citation punctuation issues, and even passive voice overuse—all things professors care about[1][7].
• It works on any device: You can use it on your laptop at home, your phone while you’re at the library, or your tablet in class[2][5]. It’s mobile-friendly, so you can check your work anywhere, anytime—no need to be glued to your laptop.
Pro tip: I once turned in a paper without using a grammar checker, and I lost 10% of my grade because of silly comma mistakes and a few run-on sentences[1]. Now, I use the best free grammar checker for students on every assignment, and my grades have gone up—all without spending a dime.
How to Spot the Best Free Grammar Checker For Students (Avoid the Duds!)
Not all free grammar checkers are good for students—some are inaccurate, some are cluttered with ads, and some claim to be free but limit how much you can use them[1][8]. Before we dive into using the tool, let’s talk about how to spot the good ones. Here’s what to look for—learn from my mistakes!
1. Truly free (no limits, no sign-up): The best free grammar checker for students should let you use it as much as you want, no sign-up required[8]. Avoid tools that ask for your email, limit you to 5 checks per day, or make you share on social media to unlock features[1][2].
2. Accurate for academic errors: It should catch student-specific mistakes like sentence fragments, run-on sentences, subject-verb agreement issues, and word choice mix-ups[3][6]. Test it with a short paragraph that has common errors (like “Their going to the library”) to see if it catches them[1][8].
3. Explains errors clearly: It should tell you why an error is wrong (e.g., “‘Their’ is a possessive pronoun—use ‘They’re’ for ‘they are’”) and show you how to fix it[4][8]. This helps you learn, not just correct[9].
4. Clean, low-ad interface: Ads are fine (it’s free!), but avoid tools with pop-up ads that cover the text box or force you to click “close” multiple times[1][7]. A good tool has minimal, non-intrusive ads[2][5].
5. Works with academic text: It should handle essays, research papers, lab reports, and dissertations[4][9]. It should ignore citation formats (like APA or MLA) and focus on the actual content[1][8].
6. Mobile-friendly: It should work on your phone without zooming in or out— the text box should be easy to paste into, and the error highlights should be easy to read[2][5].
Pro tip: I tested a few free grammar checkers that missed basic errors like “it’s/its” or didn’t explain how to fix mistakes. The best free grammar checker for students will catch those small, easy-to-miss errors that professors hate[3][6].
Step-by-Step: How to Use the Best Free Grammar Checker For Students (In 5 Minutes)
Using thebest free grammar checker for students is super easy—even if you’re not tech-savvy. I’m going to walk you through the exact steps, using a simple, student-friendly tool (the kind that’s free, no sign-up, and built for academic writing). These steps work for any good best free grammar checker for students, so no matter which one you choose, you’ll be able to fix your grammar like a pro. We’ll cover everything from pasting your text to understanding errors and fixing them.
Step 1: Find the Best Free Grammar Checker For Students
First, you need to find a reliable best free grammar checker for students. Use the checklist from the previous section to make sure it’s good: no sign-up, accurate, explains errors, clean interface, and works for academic writing[1][8].
Once you find the right tool, bookmark it in your browser. This one-time setup will save you time later—no more searching for “free grammar checker” every time you finish an assignment. I keep mine bookmarked, and I use it for every essay, research paper, and lab report I write.
Step 2: Paste Your Academic Text (Skip the Extra Stuff!)
This is the easiest part. The best free grammar checker for students will have a big, clear text box (usually labeled “Paste your essay here” or “Type your text”). Here’s what to do:
1. Open your assignment (Word, Google Docs, PDF, etc.) and copy the body of your text[2][5]. Skip the title page, headers, footers, and bibliographies—those are usually formatted correctly, and you don’t need to check them[1][4].
2. Highlight the body text and press Ctrl+C (Windows) or Cmd+C (Mac) to copy it[2][5].
3. Paste it into the text box on the grammar checker—press Ctrl+V (Windows) or Cmd+V (Mac)[2][5].
4. If you’re typing your assignment directly into the tool (not recommended—always save your work in a document!), just start typing—the tool will check for errors in real time[5][8].
Pro tip: If you’re pasting text with formatting (like bold, italics, or citations), don’t worry—the tool will ignore the formatting and only check the actual text[2][5]. No need to remove formatting first!
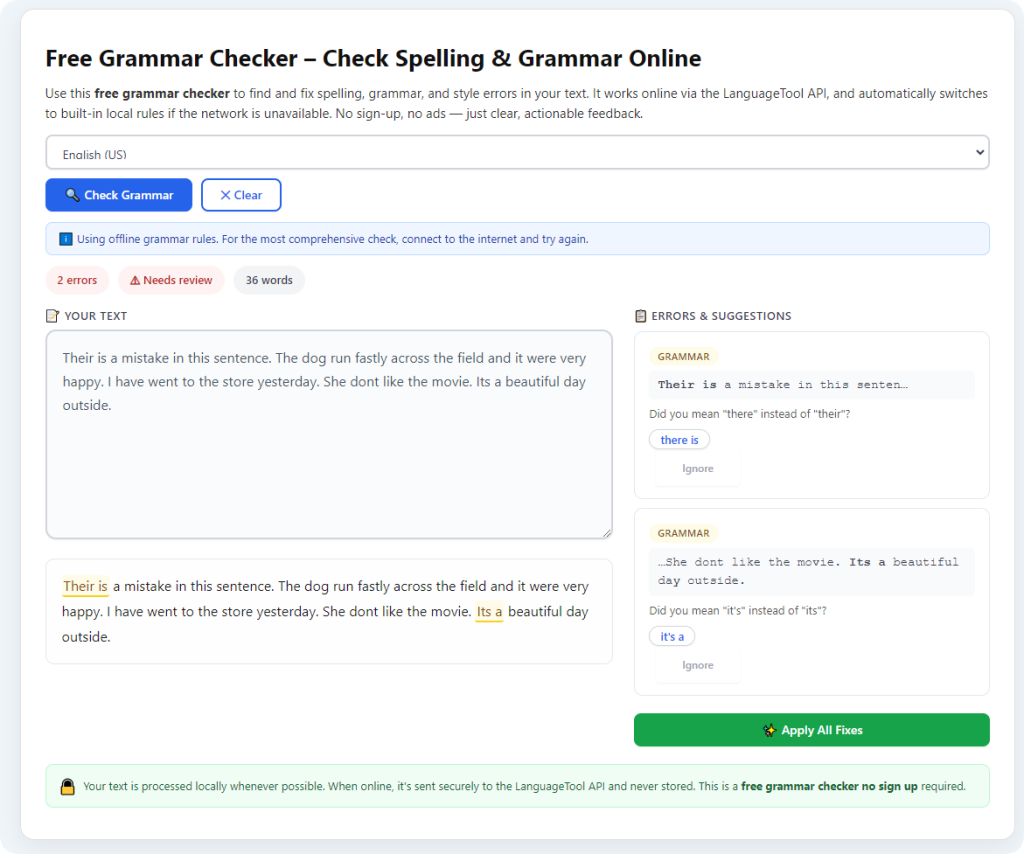
Step 3: Let the Tool Check for Errors (It’s Automatic!)
The best free grammar checker for students will start checking your text as soon as you paste it—no “submit” button required[8]. It will take 1-2 seconds (even for long papers!) to scan your text and highlight all the errors. Here’s what to look for:
• Colored highlights: Most tools use different colors to mark different types of errors—red for grammar/punctuation, yellow for clarity/word choice, and blue for style[2][5]. This makes it easy to tell what kind of mistake you’re dealing with.
• Error labels: Hover over a highlighted error, and the tool will show you a label (e.g., “Run-on sentence,” “Subject-verb agreement,” “Wrong word choice”)[4][8].
• Fix suggestions: It will give you 1-2 suggested fixes for each error[2][5]. For example, if you wrote “Their going to the park,” it will suggest “They’re going to the park” and explain the difference between “their” and “they’re”[3][6].
Example: Let’s say your text is “The student use the library every day.” The tool will highlight “use” in red, label it “Subject-verb agreement error,” and suggest “uses” (since “student” is singular, the verb should be singular)[3][6]. It will also explain: “Singular subjects require singular verbs (add -s or -es to the verb).”
Step 4: Review and Fix the Errors (Don’t Just Click “Fix All”!)
Most tools have a “Fix All” button that corrects all errors at once—but don’t use it! The best free grammar checker for students is helpful, but it’s not perfect. Sometimes it might suggest a fix that doesn’t fit your context[4][8]. Here’s how to fix errors the right way:
1. Go through each highlighted error one by one[8]. Hover over the error to read the explanation and the suggested fix[4].
2. If the suggested fix makes sense, click it to apply it[2][5]. For example, if the tool suggests changing “use” to “uses,” click it to fix the subject-verb agreement.
3. If the suggested fix doesn’t fit, ignore it or manually edit the text[4][8]. For example, if the tool suggests changing a formal word to an informal one (like “utilize” to “use”) but your professor prefers formal language, you can keep the original word.
4. Pay attention to the explanations—this is how you learn to avoid the same mistake next time[1][9]. For example, if you keep mixing up “its” and “it’s,” read the explanation carefully so you remember the rule: “Its” is possessive (no apostrophe), “it’s” is a contraction for “it is” (with an apostrophe)[3][6].
Pro tip: Take your time with this step. Rushing through fixes can lead to mistakes—you want to make sure each fix is correct for your assignment[4][8].
Step 5: Double-Check Your Fixed Text (Critical!)
Even the best free grammar checker for students can make mistakes, so it’s important to double-check your text after fixing the errors[1][8]. Here’s how:
1. Read through the entire fixed text carefully. This will help you catch any mistakes the tool missed or any awkward phrasing from the fixes[4][7].
2. Make sure the fixes fit your writing style. For example, if you’re writing a formal research paper, the tool might suggest a casual phrase—change it back to formal language[4][7].
3. Check for any errors the tool didn’t catch. For example, some tools might miss subtle clarity issues or discipline-specific terminology[1][4].
4. Cross-check with a classmate or the writing center if you’re unsure. Sometimes a second pair of eyes can catch things the tool misses[1][4].
Example: I once used the best free grammar checker for students to fix an essay, and it suggested changing “data shows” to “data show” (plural). But my professor prefers “data shows” (singular), so I changed it back. Always trust your professor’s preferences over the tool[4].
Real-Life Scenarios: Using the Best Free Grammar Checker For Students
Let’s put these steps into action with real academic scenarios you’ll actually encounter. This will show you just how useful the best free grammar checker for students is—from high school essays to college research papers[1][4].
Scenario 1: High School Essay (Formal Writing, Common Grammar Mistakes)
You’re a high school student, and you wrote a 500-word essay for English class. You’re worried about comma splices and sentence fragments—two mistakes your teacher always marks[3][6]. Here’s how to use the tool:
1. Open the best free grammar checker for students and copy-paste your essay into the text box[2][5].
2. The tool highlights 3 comma splices (e.g., “I studied for the test I got an A”) and 2 sentence fragments (e.g., “Because I forgot my notebook”)[3][6].
3. For each comma splice, the tool suggests adding a comma and conjunction (e.g., “I studied for the test, and I got an A”) or splitting the sentence[3][6].
4. For each fragment, it suggests joining it to the previous sentence (e.g., “Because I forgot my notebook, I couldn’t take notes”)[3][6].
5. You apply the fixes, read through the essay, and submit it—no more red marks for grammar errors[1][8].
Scenario 2: College Research Paper (Academic Formalism, Citation Punctuation)
You’re a college freshman, and you wrote a 2,000-word research paper for history class. You need to make sure your grammar is perfect and your citation punctuation is correct[4][7]. Here’s how to use the tool:
1. Copy-paste the body of your research paper (skip the bibliography) into the best free grammar checker for students[1][4].
2. The tool highlights subject-verb agreement errors (e.g., “The sources proves”) and citation punctuation mistakes (e.g., “(Smith 2020,” instead of “(Smith, 2020)”)[4][7].
3. You apply the fixes (change “proves” to “prove,” add the comma in the citation) and read through the paper to ensure the fixes fit[4][8].
4. You submit the paper, confident that your grammar and citation punctuation are correct—no more points lost for silly mistakes[1][4].
Scenario 3: Lab Report (Technical Writing, Passive Voice)
You’re a science student, and you wrote a lab report. Your professor wants passive voice (e.g., “The experiment was conducted” instead of “I conducted the experiment”) and no grammar errors[4][7]. Here’s how to use the tool:
1. Copy-paste your lab report into the best free grammar checker for students[2][5].
2. The tool highlights active voice sentences (e.g., “I measured the temperature”) and suggests changing them to passive voice (e.g., “The temperature was measured”)[4][7].
3. It also catches a few punctuation errors in the data tables (e.g., missing commas in numbers)[3][6].
4. You apply the fixes, making sure the passive voice fits the technical tone of the lab report[4][7].
5. You submit the report, knowing it meets your professor’s requirements[1][4].
Scenario 4: Graduate Dissertation Chapter (Complex Sentences, Clarity)
You’re a graduate student, and you’re writing a dissertation chapter with complex sentences. You need to make sure your writing is clear and free of grammar errors[4][9]. Here’s how to use the tool:
1. Copy-paste the chapter into the best free grammar checker for students[1][4].
2. The tool highlights unclear sentences (e.g., “The research that was done by the team which was from the university showed”) and suggests simplifying them (e.g., “Research done by the university team showed”)[4][7].
3. It also catches misplaced modifiers (e.g., “After finishing the study, the results were analyzed” instead of “After finishing the study, we analyzed the results”)[4][6].
4. You apply the fixes, ensuring the clarity of your complex ideas without losing academic rigor[4][9].
5. You submit the chapter, confident that your writing is clear and error-free[1][4].
Common Mistakes Students Make When Using the Best Free Grammar Checker For Students
Even if you use the best free grammar checker for students, it’s easy to make small mistakes that lead to errors in your final paper. I’ve made every single one of these, so learn from my errors[1][8]:
1. Clicking “Fix All” without reviewing: This is the biggest mistake! The tool might suggest fixes that don’t fit your context or writing style[4][8]. Always review each fix individually.
2. Ignoring the explanations: The tool’s explanations are there to help you learn[1][9]. If you just fix the error without reading the explanation, you’ll keep making the same mistake in future assignments[3][6].
3. Pasting extra text (headers, bibliographies): The tool might flag citation formatting as errors, even if it’s correct[1][4]. Always paste only the body of your text.
4. Trusting the tool 100%: No tool is perfect—some might miss subtle errors or suggest incorrect fixes[1][8]. Always double-check your text after using the tool.
5. Using it too late: Don’t wait until the last minute to use the tool[1][7]. If you use it while you write, you can fix errors as you go and avoid making the same mistakes repeatedly.
6. Forgetting to check for formal language: The tool might suggest casual words (like “guy” instead of “person”) that aren’t appropriate for academic writing[4][7]. Always adjust for formal tone.
Pro Tips to Get the Most Out of the Best Free Grammar Checker For Students
Now that you know how to use the best free grammar checker for students, these pro tips will make it even more useful—helping you improve your writing and get better grades[1][8]:
1. Bookmark the tool: As I mentioned earlier, bookmarking the best free grammar checker for students will save you time—no more searching for it every time you finish an assignment[2][5].
2. Use it while you write: Don’t wait until you’re done writing to check for errors. Paste your text into the tool after writing each paragraph to fix mistakes as you go[1][7].
3. Take notes on common errors: If the tool keeps flagging the same mistake (like “their/there/they’re”), write it down and study the rule[3][6]. This will help you avoid it in future assignments[1][9].
4. Use it for all your writing: Don’t just use it for essays—use it for lab reports, resumes, cover letters, and even emails to professors[1][7]. It will help you improve your writing overall.
5. Share it with classmates: If you have friends who are losing grades over grammar mistakes, share the best free grammar checker for students with them—they’ll thank you[1][8].
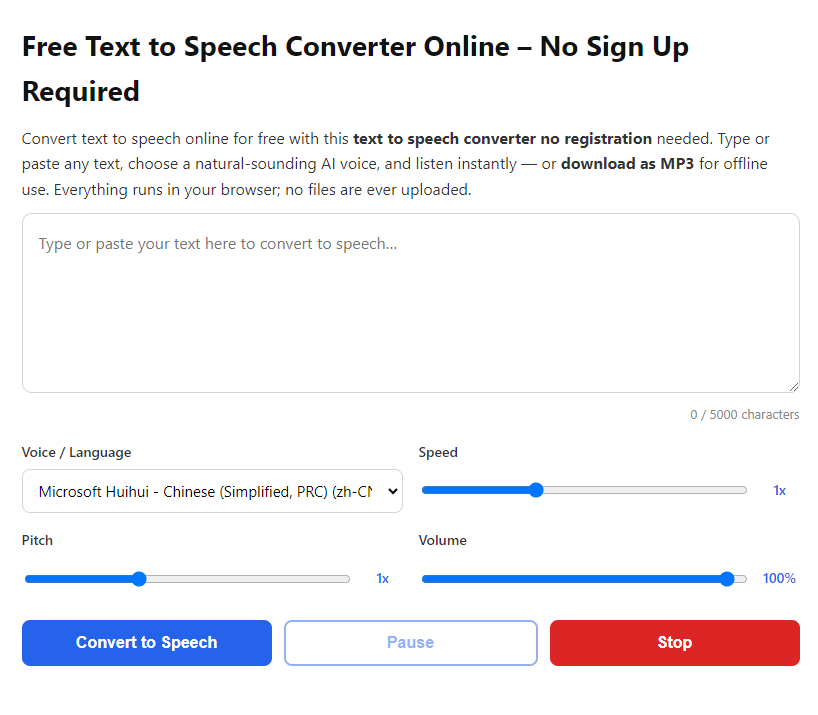
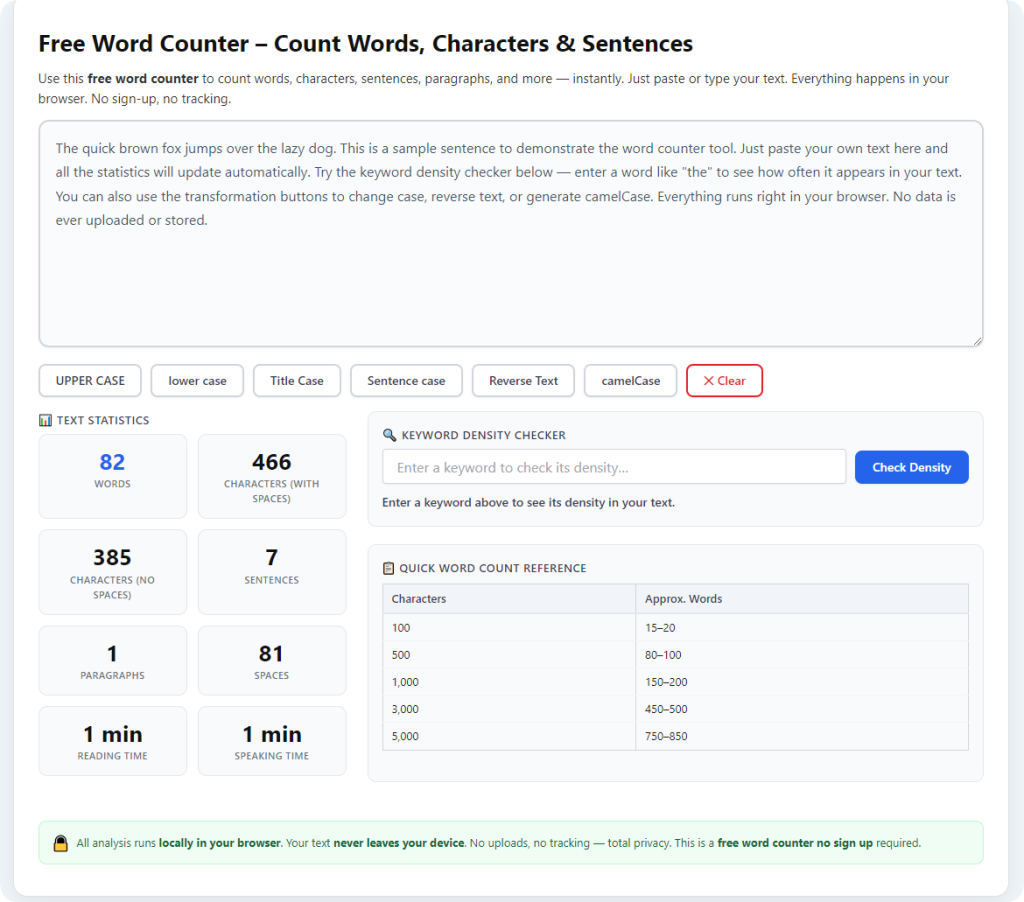
6. Combine it with other tools: Use it alongside a word counter to hit your word limit and a plagiarism checker to ensure your work is original[1][4]. This will make your assignments even stronger.
Frequently Asked Questions (FAQ) – Students’ Most Common Questions
Q: Is the best free grammar checker for students really free? A: Yes! The best ones are 100% free—no sign-up, no hidden fees, no credit card required. You can use them as much as you want for all your academic writing[1][8].
Q: Do I need tech skills to use it? A: No! The best free grammar checker for students is super simple—just paste your text, review the errors, and click to fix them. No tech jargon, no complicated steps[2][5].
Q: Does it catch all grammar errors? A: It catches most common student errors (comma splices, sentence fragments, subject-verb agreement, etc.), but no tool is perfect[1][8]. Always double-check your text after using it[4].
Q: Can I use it on my phone? A: Yes! The best free grammar checker for students is mobile-friendly and works on phones, tablets, laptops, and desktops[2][5]. You can use it anywhere, anytime.
Q: Does it explain why errors are wrong? A: Yes! The best free grammar checker for students explains each error in simple terms and shows you how to fix it[4][8]. This helps you learn and avoid the same mistake next time[1][9].
Q: Can it help with academic writing specifically? A: Yes! It’s built for students, so it understands academic writing rules—formal language, citation punctuation, and student-specific mistakes[1][4]. It’s way better than generic grammar checkers[7].
Final Thoughts – Why Every Student Needs the Best Free Grammar Checker For Students
As students, we put so much time and effort into our assignments—researching, writing, and editing. The last thing we want is to lose grades over silly grammar mistakes that we could have fixed easily. The best free grammar checker for students is a simple, free tool that takes the stress out of proofreading. It catches errors you miss, teaches you how to fix them, and helps you submit polished, error-free work—all without spending a dime[1][8].
The key takeaway? Don’t rely on spell check, and don’t waste money on paid grammar checkers. The best free grammar checker for students is free, easy to use, and built specifically for us. It saves you time, reduces stress, and helps you improve your writing—all of which lead to better grades[1][4].
Whether you’re a high school student writing essays, a college student working on research papers, or a graduate student tackling a dissertation, this tool is a lifesaver[4][9]. It’s not just a grammar checker—it’s a learning tool that helps you become a better writer.
So next time you finish an assignment, don’t submit it without checking for grammar errors. Use the best free grammar checker for students—you’ll be amazed at how many mistakes it catches, and you’ll wonder how you ever submitted work without it. It’s free, it’s easy, it’s helpful—what more could you ask for? Start using it today, and stop losing unnecessary points over grammar mistakes!
After learning the operation method, click the link below to enter the tool page for immediate use.