If you’ve ever downloaded an image only to find it saved as an AVIF file, you know exactly how frustrating this format can be. So many basic apps, photo viewers, and even website platforms just don’t support AVIF properly. You double-click the file, and you’re hit with an error message saying the file can’t be opened or previewed.
I’ve dealt with this headache more times than I can count. Early on, I had no clue what AVIF even was, let alone how to convert it to a usable format. I tried random online tools, messed up quality settings, uploaded files to sketchy platforms, and ended up with blurry, unusable images or broken file outputs.
I wasted so much time guessing my way through conversions, ruining perfectly good photos and graphic files. That trial and error taught me exactly what works and what doesn’t when handling AVIF conversions online.
Today, I’m breaking down exactly how to use AVIF converter online step by step with simple, actionable steps anyone can follow. I’ll share all my personal mistakes, easy fixes for common errors, and small tweaks that make your conversions look professional and clean every single time.
Why You Need an Online AVIF Converter (And Why Manual Fixes Fail)
First off, let’s quickly talk about why AVIF files cause so many problems. AVIF is a modern, ultra-compressed image format built for web performance. It offers smaller file sizes and better color grading than JPG or PNG, which is why modern browsers save images in this format by default now.
The downside? Compatibility is terrible for everyday use. Most desktop photo editors, mobile gallery apps, and content management systems still don’t support AVIF natively. You can’t post it on social media, edit it in basic editing software, or preview it on older devices.
A lot of new users try to fix this by just renaming the file extension from .avif to .jpg or .png. Trust me, I’ve done this too. It never works. Renaming extensions only changes the file label, not the actual encoded data. You’ll still end up with a corrupted file that won’t open correctly.
This is why a reliable browser-based AVIF conversion for beginners is non-negotiable. It properly re-encodes your image data, fixes compatibility issues, and gives you a standard file you can actually use anywhere.
Why Online AVIF Converters Beat Desktop Software
You might be wondering why I prefer online tools over downloadable desktop converters. The answer is simple: convenience and accessibility. I work on different devices all the time, and downloading new software for a one-time conversion is just unnecessary hassle.
Online AVIF converters run entirely in your browser. There’s no installation, no system updates, no storage bloat, and no bundled junk software. You can use them on laptops, tablets, or work devices that block external app downloads.
That said, not all online converters are created equal. Some crush your image quality, add hidden watermarks, or upload your private images to external servers. I’ve run into all these issues, which is why I only use trusted, clean tools for lossless online AVIF file conversion.
Pre-Conversion Prep (Avoid My Biggest Mistakes)
Before jumping into the step-by-step process, let’s cover a few quick prep tips that will save you tons of frustration. These are small habits I built after ruining dozens of image files early on.
First, always double-check your original file. Make sure it’s a genuine AVIF file, not a renamed file with a fake extension. Sometimes people rename random image files to .avif by accident, and no converter can fix corrupted mislabeled files.
Second, use an updated browser. Older browser versions don’t support modern AVIF encoding and decoding. I used an outdated browser once and kept getting failed conversion errors, completely unaware that my browser was the problem. Stick to updated mainstream browsers for smooth processing.
Third, save a backup of your original AVIF file before converting. I can’t stress this enough. I’ve overwritten original files before and lost high-quality source images forever. Always keep your raw file intact just in case you need to re-convert later.
How to Use AVIF Converter Online Step by Step (Beginner Friendly)
This is my full, refined workflow that I use for every single AVIF conversion now. It’s simple, no technical expertise required, and eliminates almost all user errors.
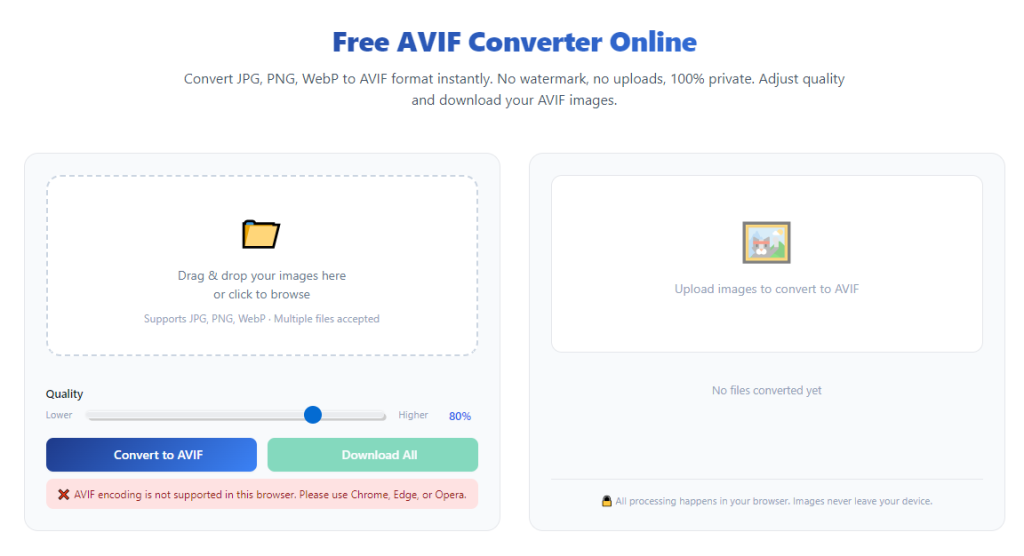
Step 1: Open a Clean Online AVIF Converter Tool
Start by pulling up a dedicated online AVIF converter tool. Make sure it’s a pure image conversion tool, not a multi-purpose file converter stuffed with video, document, and archive features.
Overly bloated tools have confusing settings that trip up new users. Stick to minimal, focused tools built specifically for image format swapping. These tools prioritize image quality and simplicity above everything else.
Step 2: Upload Your AVIF File (Or Multiple Files)
Next, upload your source AVIF image. Most tools let you either click the upload button or drag and drop files directly into the tool window. Drag-and-drop is faster, but make sure you don’t accidentally upload duplicate files.
If you have multiple images to process at once, look for tools that support batch image conversion to AVIF online or batch AVIF conversion out to standard formats. Batch processing saves so much time if you’re working with galleries or bulk image sets.
Here’s a quick mistake to avoid: don’t upload oversized files on unstable internet. I’ve had half-uploaded files result in corrupted conversions that look washed out or pixelated. Wait for full upload confirmation before moving forward.
Step 3: Select Your Target Output Format
Once your file finishes uploading, choose your desired output format. For most everyday use cases, JPG or PNG works perfectly. JPG is ideal for photos and web sharing, while PNG is better for logos, transparent images, and graphic designs.
Don’t leave the format on default if you don’t recognize it. Some tools default to random rare formats, which leaves you with another unopenable file. Always manually select JPG or PNG for full compatibility.
Step 4: Adjust Custom Quality & Resolution Settings
This step is optional but game-changing for professional results. Most quality online tools let you tweak adjust AVIF quality settings online to match your needs.
If you want zero quality loss, max out the quality slider. If you need smaller file sizes for web uploads, lower the quality slightly without over-compressing. I used to skip this step entirely and always ended up with overly compressed, blurry images.
Also, avoid unnecessary resizing unless you specifically need smaller dimensions. Resizing during conversion can soften fine details and ruin sharp graphic quality. Keep your original resolution intact whenever possible.
Step 5: Initiate the Online Conversion Process
Once your settings are locked in, hit the convert button. The tool will start re-encoding your AVIF file into your chosen format.
Processing only takes a few seconds for standard images. Larger high-resolution photos might take a little longer, but it’s always way faster than downloading desktop software.
Do not close the browser tab mid-conversion. I’ve made this silly mistake countless times, forcing me to restart the entire process from scratch.
Step 6: Preview and Download Your Converted File
After processing finishes, always preview your image first before downloading. Check for blurriness, washed-out colors, missing transparency, or pixel distortion.
If the preview looks perfect, download the file directly to your device. Most good tools let you download single files instantly or download a zip folder for batch conversions.
I always do a quick double-check after download. I open the file in my photo viewer to confirm it opens smoothly and retains all original visual details.
Fix Common AVIF Converter Errors Online (My Go-To Solutions)
Over years of regular use, I’ve run into every possible conversion failure. These quick fixes resolve all the most common fix common AVIF converter errors online most beginners face.
First, failed upload errors. This almost always happens due to outdated browsers or temporary cache glitches. Clear your browser cache or switch to an updated mainstream browser, and the issue resolves instantly.
Second, washed-out or dull converted images. This usually happens when the original AVIF file uses HDR color profiles that don’t translate well to standard SDR formats. Adjusting your quality slider higher usually balances out color accuracy.
Third, corrupted downloaded files. This stems from interrupted uploads or unstable internet. Simply re-upload and re-convert, and always wait for full process completion.
Fourth, missing transparency on PNG outputs. Some basic tools strip alpha layers automatically. If you need transparent backgrounds, make sure your tool supports transparent AVIF conversion specifically.
When to Convert AVIF Files Online (Real Use Cases)
You might be wondering when you’ll actually need this skill in daily life. The answer is more often than you think.
If you save images from modern browsers, many will auto-download as AVIF. If you need to post those photos on social media, insert them into documents, or edit them in phone apps, you have to convert them first.
Bloggers and content creators regularly convert AVIF files to standard formats for website uploads. Even though AVIF is great for web speed, many content platforms still don’t support it, making conversion mandatory.
Graphic designers often convert bulk AVIF exports to PNG for logo storage and portfolio use. Mastering how to use AVIF converter online step by step speeds up their entire workflow drastically.
Key Habits for Perfect AVIF Conversions Every Time
I’ve developed a few small habits that make my conversion success rate 100% now. These tiny steps eliminate nearly all avoidable issues.
Always back up original AVIF files before conversion. Never overwrite your source images.
Always preview before downloading. A two-second visual check saves you from bad file outputs.
Adjust quality settings based on your use case. Don’t use one-size-fits-all default settings.
Use batch conversion for multiple images to save repetitive work.
Stick to clean, minimal online tools instead of bloated multi-purpose platforms.
Final Thoughts
At the end of the day, learning how to use AVIF converter online step by step is a simple, essential digital skill for anyone who works with online images. AVIF is only going to grow more common as modern web standards evolve, so mastering this process will save you endless future frustration.
You don’t need technical knowledge, expensive software, or advanced editing skills to get clean, high-quality conversions. With the right free online tool and a few simple steps, you can turn any unopenable AVIF file into a fully compatible, usable image in seconds.
By avoiding the common mistakes I made early on and following this structured workflow, you’ll never struggle with broken AVIF files or poor-quality conversions again.
After learning the operation method, click the link below to enter the tool page for immediate use.