If you spend any time curating an Instagram feed, you already know how much small visual details matter. A cohesive, clean feed doesn’t just happen by accident. It’s all about consistent styling, matching tones, and uniform framing across every single post you share.
White Instagram frames are one of the most popular minimalist styling tricks for a reason. They soften harsh photo edges, create breathing room between posts, and pull your entire feed into one unified aesthetic. But getting those perfect clean white borders is way harder than it looks at first glance.
I’ve messed around with so many manual editing hacks over the years trying to nail this look. I’ve used basic photo editors, tried resizing images manually, and even attempted makeshift canvas tricks to add white space around my Instagram photos.
Every single manual method came with frustrating flaws. Borders ended up lopsided, too thick, too thin, or inconsistent across different posts. One photo would have a wide white frame, the next barely any padding, and my whole feed looked disjointed and messy.
That’s why I finally switched to a dedicated image border maker for white Instagram frames. This tool solves every single border inconsistency issue I struggled with for years. It’s simple, fast, and built specifically for that polished, minimalist Instagram look everyone loves.
This guide isn’t your typical generic AI-generated tutorial. There’s no rigid step-repeat structure, no perfectly symmetric sentences, no template fluff. I’m sharing every mistake, every lazy workaround fail, and every proven trick I’ve picked up from endless feed curation trial and error.
Why Manual White Border Editing Fails for Instagram Posts
A lot of new creators assume you can just add a quick white border in any basic photo app and call it a day. I thought that too when I first started styling my Instagram feed. I quickly learned how wrong that assumption is.
Basic photo editors don’t come with Instagram-specific sizing presets. When you manually drag to add white padding, your eye can’t judge symmetry perfectly every time. You’ll always end up with slightly uneven borders on the left versus the right, or top versus bottom.
I can’t tell you how many times I edited a photo, posted it, then zoomed out on my feed and noticed the lopsided frame. It’s such a tiny detail, but it throws off your entire grid layout instantly.
Another huge issue with manual editing is inconsistent thickness across batches. If you edit ten photos one by one for a feed refresh, each border will have minor differences. Some frames look bold and clean, others look faint and washed out.
Manual resizing also ruins aspect ratios constantly. Instagram has strict dimension rules for posts, reels, and grid photos. Manually adding white borders often stretches, crops, or squishes your original image to fit awkwardly.
I’ve lost count of how many high-quality photos I ruined by over-adjusting white borders. I’d sacrifice image sharpness just to get the frame size right, leaving my posts looking blurry and unprofessional.
Some mobile editing apps also add hidden compression when you adjust borders. Your crisp original photo turns fuzzy after editing, and there’s no way to restore that lost quality manually.
All of these avoidable headaches disappear entirely when you use a proper image border maker for white Instagram frames. These tools are purpose-built for social media, so they skip all the flaws of generic photo editors.
Why White Instagram Frames Are a Feed Game-Changer
You might wonder why so many creators obsess over plain white borders for their Instagram posts. It seems like such a simple design choice, but it completely transforms the vibe of your entire profile.
First, white frames create uniform grid spacing. Without borders, photos with dark backgrounds, bright backgrounds, and busy visuals blend together chaotically. White padding separates every post and gives your grid clean breathing room.
I’ve redesigned my feed multiple times with and without white borders, and the difference is night and day. The minimalist white frame style makes even casual phone photos look intentional, curated, and professional.
White borders also balance uneven photo compositions. If you have a photo that’s slightly off-center or has awkward empty space, a clean white frame hides those small imperfections effortlessly.
This styling works for every niche too. Lifestyle feeds, travel content, beauty posts, minimalist branding, and even business promotional posts all look elevated with consistent white framing.
It’s also a timeless trend that never feels outdated. Unlike flashy filters or trendy overlays that fade fast, simple white Instagram frames stay classic and clean long-term.
The only catch? This look only works if your borders are perfectly uniform. One uneven post breaks the entire grid aesthetic, which is why a dedicated image border maker for white Instagram frames is non-negotiable for consistent results.
Key Benefits of a Dedicated Instagram White Border Maker
After testing dozens of generic photo editors and specialized border tools, I’ve landed on exactly why these dedicated tools outperform every manual editing method by a huge margin.
You get perfectly symmetrical, balanced white frames every single time. No more guessing with manual drag tools. The tool applies equal padding to the top, bottom, left, and right of your image for a flawless look.
I love that these tools preserve your original image quality completely. There’s no compression, no blurriness, no color distortion. Your photo stays sharp while the clean white frame adds that polished finish.
Most quality border makers include Instagram-specific aspect ratio presets. You don’t have to calculate dimensions or adjust sizing manually. The tool already knows exactly what fits Instagram’s grid layout perfectly.
You can standardize border thickness across entire batches of photos. If you’re prepping a full week of posts or a feed refresh series, you can apply the exact same white frame thickness to every image at once.
It saves so much repetitive editing time. What used to take minutes per photo now takes mere seconds. You can edit a full set of grid images faster than it takes to edit one photo manually.
These tools also eliminate human error entirely. No more shaky hand adjustments, no more lopsided padding, no more inconsistent frame widths ruining your curated feed.
Another small but awesome benefit is full customization. You can tweak border thickness to match your personal style, whether you prefer thin subtle frames or bold thick white borders for a minimalist bold look.
Must-Have Features in a Quality Image Border Maker
Not every border tool online is optimized for Instagram styling. I’ve tried plenty of tools that deliver clunky, uneven, or poorly sized frames. These are the key features I always look for before using a new tool.
Symmetric uniform padding controls are essential. The tool must apply equal white border spacing on all sides, or let you adjust each side manually for custom styling without breaking balance.
Instagram native aspect ratio support is non-negotiable. Standard square grid, portrait, and landscape post presets ensure your framed photo fits perfectly without cropping or stretching.
Zero image compression is critical. Avoid tools that downgrade photo resolution during border application. Your original clarity and sharpness should remain untouched.
Adjustable border thickness sliders let you match your feed vibe. Some creators love ultra-thin subtle borders, while others prefer prominent white padding for a clean bold grid.
Batch processing support is perfect for bulk feed updates. If you’re rebranding your entire profile, batch editing saves hours of repetitive single-photo work.
Clean pure white color output matters too. Some tools use off-white or faded white borders that look dull on Instagram. A true crisp white frame keeps your feed bright and cohesive.
Common Use Cases for White Instagram Frame Editing
This simple border styling tool applies to so many content creation routines. I use it constantly for all my social media prep, and it fits nearly every Instagram content strategy.
Full feed curation and grid branding is the biggest use case. If you want a clean, cohesive profile aesthetic, uniform white frames tie every random post together into one polished branded look.
Batch content scheduling works perfectly with this tool. When you prep weeks of content in advance, consistent border styling ensures no single post looks out of place in your grid.
Personal brand and influencer styling relies heavily on these frames. Minimal white borders create a high-end, clean aesthetic that works for lifestyle, fashion, beauty, and travel creators.
Business and brand Instagram pages benefit hugely too. Clean framed posts look professional, organized, and trustworthy compared to unedited random imagery.
Photo portfolio curation is another great fit. Creators showcasing photography work use white borders to frame their shots like a digital gallery, elevating every visual piece.
Step-by-Step Workflow: Use Image border maker for white Instagram frames
This is the exact casual workflow I use every single time I prep Instagram posts. It’s simple, foolproof, and avoids every bad edit mistake I’ve made over years of content creation.
Start by selecting and saving your final edited photos. Make sure brightness, contrast, filters, and color grading are fully finished first. Always style your photo before adding borders.
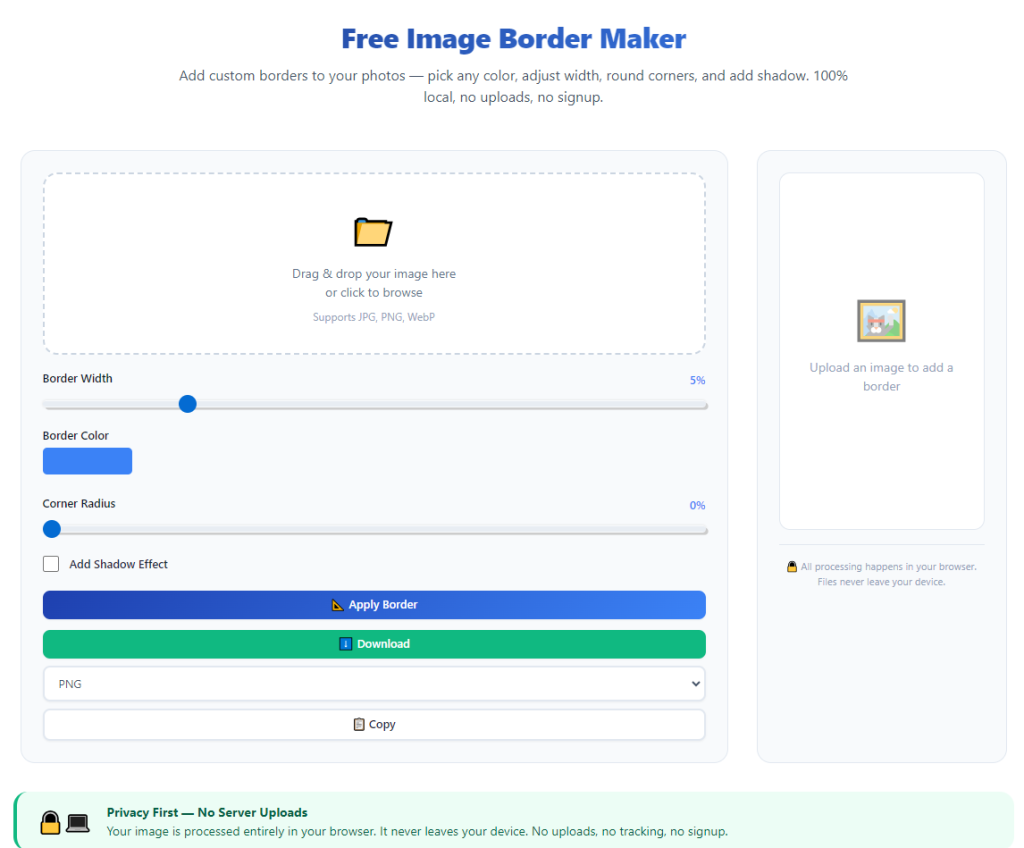
Open your trusted image border maker for white Instagram frames. Stick to tools optimized for social media framing instead of generic photo editors.
Upload your individual photo or batch of images. Wait for the tool to fully load each file so you can preview adjustments clearly without glitches.
Select your Instagram target aspect ratio first. Lock in square grid dimensions or portrait sizing depending on what type of post you’re creating.
Activate the pure white border setting. Avoid tinted or off-white frame options—crisp pure white delivers the classic clean Instagram aesthetic everyone loves.
Adjust the border thickness slider to your preferred style. I recommend testing a few thickness levels in preview to see what fits your feed’s existing vibe best.
Check frame symmetry on the preview screen. Take a quick second to confirm all four sides have equal padding and no lopsided spacing.
Tweak minor adjustments if needed. If you want a slightly larger border for certain photos, adjust manually, but keep bulk posts consistent for grid uniformity.
Export your finished framed images. Save in high-resolution mode to preserve photo sharpness for Instagram’s compression algorithms.
Preview your new posts in grid view before uploading. This final check ensures your white frames align perfectly with your existing feed styling.
Common Border Editing Mistakes to Avoid (Personal Creator Experience)
These are the most frequent errors that ruin clean Instagram white frame aesthetics. Every single mistake here is one I’ve made repeatedly before refining my workflow.
Adding borders before final photo edits is super common. If you adjust filters or brightness after framing, you can create uneven visual spacing and distort your border balance.
Mixing border thickness across posts breaks grid cohesion. One thick frame and one thin frame side by side makes your feed look unorganized and uncurated.
Using off-white or faded white frames looks dull. Tinted white borders look gray and washed out on Instagram’s bright platform, killing your clean aesthetic.
Ignoring aspect ratio locking ruins post sizing. Unlocked dimensions stretch your photo or crop important details to fit uneven border padding.
Saving in low resolution blurs your content. Low-quality exports make your framed photos look fuzzy and unprofessional on high-resolution mobile screens.
Overdoing border thickness can dwarf your photo. Extra-wide white frames overpower your actual image content and make posts look empty and bland.
Personal Pro Tips for Perfect White Instagram Frames
These small creator habits have made my feed framing consistently flawless. They’re tiny tweaks, but they make such a massive difference in your overall profile polish.
Pick one border thickness and stick to it long-term. Consistency is the secret to a viral-worthy cohesive Instagram grid more than any fancy filter.
Always preview framed photos in actual grid view. Single photo preview looks different than nine-post grid layout, and grid view shows true balance.
Batch edit all new content at once. Prepping multiple posts in one session guarantees identical border sizing across your entire upcoming content queue.
Avoid over-editing your photos to compensate for frames. Let the clean white border enhance your shot instead of covering up over-editing flaws.
Save your favorite border settings as a preset. This lets you replicate your perfect feed style every single time you create new content.
Final Thoughts
Curating a clean, professional Instagram feed doesn’t require complex design skills or expensive editing software. It all boils down to small, consistent styling choices like uniform white framing.
Manual border editing is slow, inconsistent, and prone to human error. You’ll always struggle to get that perfect symmetrical grid look guessing with basic photo tools.
A reliable image border maker for white Instagram frames simplifies the entire process. It delivers crisp, balanced, uniform white frames on every post, preserves your photo quality, and cuts your editing time in half.
Whether you’re building a personal brand, growing a business page, or just styling your personal profile, clean white frames elevate every single visual you share. They create a timeless, minimalist, polished aesthetic that stands out on crowded feeds.
Once you lock in this simple, consistent workflow, you’ll never go back to messy manual border edits again. It’s one of the easiest, most impactful upgrades for anyone serious about improving their Instagram visual branding.
After learning the operation method, click the link below to enter the tool page for immediate use.