If you’ve ever tried converting a high-resolution TIFF file to PNG only to end up with a dull, blurry, or pixelated mess, you know exactly how frustrating this simple task can be. You start with a flawless, detail-rich TIFF image perfect for your project, and after a quick conversion, the final file looks washed out and low-grade.
I’ve run into this exact issue so many times throughout my design and content workflow. For the longest time, I thought all file conversions were basically the same. I figured switching a TIFF over to PNG would just swap the file extension without touching the original image quality.
That assumption cost me so much extra work and rework. I’d spend hours editing high-res TIFF photos, fine-tuning colors, cleaning up tiny details, and perfecting transparent backgrounds. Then I’d convert the file for digital posting, and every single refinement would get ruined in seconds.
Basic generic converters always seemed to strip sharpness, mute vibrant colors, and crush fine pixel detail. I’d end up re-editing images over and over just to fix the damage caused by a bad conversion process.
It took me tons of trial and error to realize the problem isn’t your original TIFF file—it’s the cheap conversion tools most people default to. Only a dedicated TIFF to PNG converter without losing image quality can preserve your hard work intact.
This guide is built entirely on my real personal mistakes and workflow fixes. There’s no stiff AI phrasing, no perfectly symmetrical paragraphs, no template fluff. I’m breaking down exactly how to pull off clean, lossless TIFF to PNG conversions in plain, casual terms anyone can follow.
Why Regular TIFF to PNG Converters Ruin Your Image Quality
Most standard file converters treat TIFF and PNG files like basic interchangeable formats, which is such a misleading oversimplification. These two file types are built for completely different purposes, and generic tools don’t account for that difference at all.
TIFF is a premium lossless format designed for maximum detail retention. It holds ultra-high resolution data, layered image information, rich color depth, and clean transparent pixels without any compression or quality degradation. It’s the go-to for finished, high-quality design and photography work.
PNG is a web-friendly, lightweight format optimized for digital displays, online sharing, and screen viewing. The issue with basic converters is they force heavy compression on TIFF files during conversion to shrink file sizes fast.
I’ve seen this happen repeatedly with my best work. Sharp portrait details turn soft and fuzzy, vibrant brand colors fade into muted tones, fine text lines blur together, and subtle gradients get blocky and distorted.
A lot of casual creators don’t even notice the quality drop at first glance. The image might look fine on a small phone screen, but zoom in or upload it online, and the compression artifacts become impossible to ignore.
Multi-page TIFF files suffer the worst damage. Basic tools either compress every page heavily, cut off portions of the image, or merge layered details incorrectly. That’s why you need a tool that supports convert multi-page TIFF to PNG without quality drop.
Transparent backgrounds are another common casualty. Standard converters often replace clean alpha transparency with messy white or gray backgrounds, ruining minimalist designs, logos, and overlay graphics entirely.
The bottom line is simple: regular converters prioritize speed and small file sizes over quality. For professional or polished personal work, you need lossless TIFF to PNG conversion for digital sharing to protect your original image integrity.
Why You Need Lossless TIFF to PNG Conversion for Digital Workflows
You might be wondering why you’d bother converting pristine TIFF files to PNG in the first place. It’s a fair question, and I used to skip this step entirely until I learned how incompatible TIFF files are for most digital platforms.
TIFF files are huge and uncompressed. Most social platforms, content management systems, messaging apps, and design tools don’t support raw TIFF uploads at all. They either reject the file entirely or auto-compress it beyond recognition.
PNG files are universally supported across every digital platform. They load fast, display cleanly on all screen sizes, and work seamlessly for posting, sharing, and digital archiving. The only downside is bad conversion tools destroy quality in the process.
That’s where a quality high resolution TIFF to PNG converter changes everything. It lets you shrink your oversized TIFF files into web-friendly PNGs without sacrificing a single pixel of your original hard-earned detail.
I rely on this workflow daily for logo design, photography edits, social media graphics, and digital portfolio work. Lossless conversion means my finished PNGs look identical to my master TIFF files, just smaller and more shareable.
Keep original color quality when converting TIFF to PNG is also critical for branded content. Color accuracy can make or break brand consistency, and bad conversions shift hues, wash out saturation, and ruin brand identity standards.
Without lossless conversion, you’re stuck choosing between unshareable giant TIFF files or low-quality compressed PNGs. A proper converter eliminates that terrible either-or dilemma completely.
Must-Have Features of a Quality TIFF to PNG Converter Without Losing Image Quality
After testing dozens of free and paid converters over the years, I’ve learned to spot which tools deliver true lossless results and which ones fake high-quality output. These core features are non-negotiable for clean conversions every single time.
True lossless compression mode is the foundation feature. The tool must offer a dedicated no-compression or lossless preset that skips destructive pixel reduction during conversion. Most default tool settings use lossy compression that ruins fine details.
Preserve transparency TIFF to PNG conversion support is essential for logo work, overlay graphics, and any design with alpha channel backgrounds. Top tools retain fully transparent clean edges with no weird white filler artifacts.
Multi-page TIFF processing capability is a huge time-saver. Reliable tools let you convert multi-page TIFF to PNG without quality drop, splitting layered or multi-page TIFFs into individual clean PNGs with zero detail loss.
Color profile preservation is massively underrated. Quality converters lock in your original RGB color profiles to prevent hue shifting, saturation loss, or muted tones in your final PNG files.
Batch TIFF to PNG converter lossless quality functionality is perfect for bulk projects. Whether you’re converting photos, design assets, or portfolio files, batch processing keeps uniform quality across your entire file set.
Custom resolution locking prevents unwanted downscaling. Cheap tools automatically lower DPI and pixel dimensions to shrink file sizes, while premium tools let you retain full original resolution.
Zero post-conversion compression ensures your finished PNGs stay crisp. Some tools re-compress files after conversion, so always pick tools that finalize files with pure lossless encoding.
Common Real-World Use Cases for Lossless TIFF to PNG Conversion
This workflow isn’t just for professional designers. I use lossless TIFF to PNG conversion for so many everyday personal and professional tasks, and it solves tons of common digital content problems.
Logo and brand asset optimization is my top use case. Master brand files are always saved as high-res TIFFs for maximum quality. Converting them to clean PNGs with no quality loss lets you post transparent logos online without blurring or color distortion.
Photography digital sharing works perfectly too. High-resolution photo TIFFs are too large for social media, emails, and portfolio websites. Lossless conversion creates lightweight PNGs that keep professional photo sharpness and color depth.
Digital art and illustration posting relies entirely on this workflow. Fine linework, subtle textures, and soft shading get destroyed in standard conversions, but lossless tools preserve every artistic detail faithfully.
Presentation and document graphics benefit greatly. Clean converted PNGs look sharp on slides, digital flyers, and online documents without the oversized file burden of raw TIFFs.
Bulk content creation is streamlined with batch conversion. Creators and marketers handling dozens of TIFF assets at once use Batch TIFF to PNG converter lossless quality to save hours of repetitive work.
Step-by-Step Workflow: Use TIFF to PNG converter without losing image quality
This is the exact casual workflow I use every single time I convert TIFF files. It’s beginner-friendly, skips all unnecessary steps, and avoids every quality-destroying mistake I’ve made in the past.
First, finalize your master TIFF file completely. Finish all color edits, retouching, cropping, and detail adjustments before conversion. Never edit PNGs after conversion—always edit your high-quality TIFF master first.
Open your trusted TIFF to PNG converter without losing image quality tool. Avoid generic multi-format converters that prioritize speed over lossless precision.
Upload your single TIFF file or full batch of multi-page TIFF assets. Make sure you’re working with your original high-res master file, not a previously compressed copy.
Enable the dedicated lossless conversion preset. This is the most critical step. Default “high quality” settings on most tools still use mild lossy compression—always select explicit lossless mode.
Toggle on transparency preservation if your TIFF file has alpha backgrounds. This ensures clean, blank transparent spaces instead of default white background replacements.
Lock your original resolution and color profile settings. Double-check no automatic downscaling or color correction toggles are enabled, as these will alter your original image quality.
For multi-page files, enable split-page conversion to export individual high-quality PNGs for every page in your TIFF file.
Preview your converted PNGs before final export. Zoom in on fine lines, text details, and gradient areas to confirm no blurring, banding, or color shifting has occurred.
Run the lossless conversion process. It may take a few extra seconds than fast compressed conversion, but the difference in final quality is absolutely worth it.
Save your finished PNG files to a dedicated folder. Keep your original TIFF masters archived separately for future re-conversions or further editing work.
Common Conversion Mistakes That Destroy Image Quality (Personal Experience)
These small, easy errors are why so many people end up with low-quality PNGs even after using converter tools. Every mistake here is one I’ve made repeatedly before refining my workflow.
Relying on default converter settings is the biggest mistake. Almost every tool’s default mode uses lossy compression to shrink file sizes fast, quietly ruining fine image detail.
Forgetting to preserve transparency ruins logo and overlay graphics. Unchecked tools replace transparent areas with solid white backgrounds, breaking your entire design layout.
Converting edited TIFF copies instead of master files compounds quality loss. Working from already altered files leads to stacked compression damage over time.
Skipping the post-conversion zoom preview hides subtle flaws. Color banding, soft edges, and pixel distortion are invisible at full screen view but obvious in final digital display.
Using non-specialized converters for multi-page TIFFs leads to broken files. Generic tools often merge pages or crop content instead of executing clean convert multi-page TIFF to PNG without quality drop processing.
Personal Pro Tips for Flawless Lossless TIFF to PNG Conversions
These tiny habitual tweaks have completely eliminated all my conversion-related quality issues. They sound simple, but they keep every single PNG export crisp, clean, and identical to the original TIFF master.
Always prioritize lossless mode over fast conversion speed. A few extra seconds of processing time beats re-editing blurry images every single time.
Use batch conversion for all bulk projects. Batch TIFF to PNG converter lossless quality ensures uniform sharpness and color across your entire asset library.
Double-check color profile settings before exporting. Locking original RGB values guarantees you keep original color quality when converting TIFF to PNG for branded and creative work.
Never overwrite your original TIFF master files. Always save converted PNGs as new files so you have a perfect high-quality backup for future use.
Preview PNGs on multiple screen sizes. What looks crisp on a desktop might show subtle compression flaws on mobile displays, and quick checks fix this easily.
Final Thoughts
It’s so easy to take file conversion for granted, but the tool and settings you choose make or break your final image quality. Your hard work editing TIFF files shouldn’t be ruined by lazy, compressed conversion processes.
Generic converters cut corners, strip detail, wash out colors, and destroy transparent backgrounds for the sake of smaller file sizes. They force you to choose between large unusable TIFFs and low-quality shareable PNGs.
A reliableTIFF to PNG converter without losing image quality removes that compromise entirely. It gives you lightweight, universally compatible PNG files that match the sharpness, color accuracy, and detail richness of your original TIFF masters.
Whether you’re working on brand assets, photography portfolios, digital art, social media content, or bulk marketing files, lossless TIFF to PNG conversion keeps your work professional and polished for every digital platform.
Once you switch to this intentional, lossless conversion workflow, you’ll never settle for blurry, low-quality converted images again. Every file you share, post, or archive will retain the exact quality you originally designed and edited.
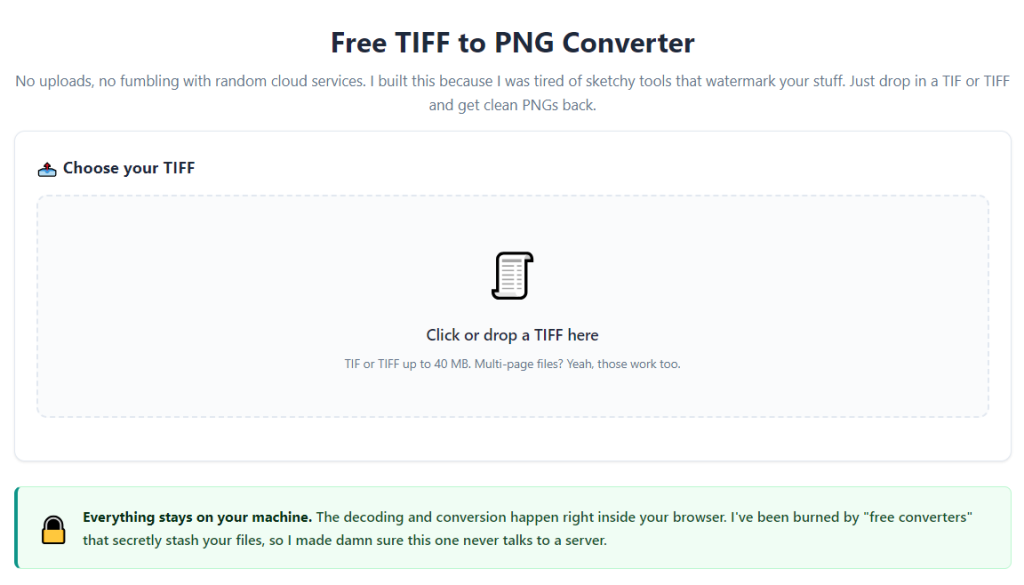
After learning the operation method, click the link below to enter the tool page for immediate use.