If you work with digital visuals for social media, print design, product listings or creative artwork, image quality directly shapes audience impressions. Small low-resolution files often fail to fit larger canvas sizes needed for posters, banners or high-definition display screens.
Most casual users make one critical mistake: stretching raw small images manually. Basic resize functions in simple editors instantly break clarity, creating jagged edges, fuzzy textures and heavy pixelation across the whole frame.
Many people waste hours testing basic editing tools only to end up with unusable blurry assets. They either settle for low-quality visuals or abandon projects entirely due to scaling-related quality loss.
Mastering how to use image upscaler without pixelation eliminates this recurring frustration. Purpose-built upscaling tools leverage advanced processing logic to enlarge photos while preserving smooth edges, fine textures and sharp detail at every dimension.
This complete walkthrough breaks down why regular resizing creates pixel blur, core advantages of specialized upscaling software, non-negotiable tool features, real-world creative use cases and a detailed step-by-step workflow to master pixel-free image enlargement.
Common Problems Caused By Basic Image Resizing Tools
Standard built-in resize functions inside generic editing platforms were never built for high-quality enlargement. Their simple interpolation methods create visible pixelation that ruins professional visuals instantly.
Jagged pixel borders on all hard-edged elements
Text, logos, product outlines and graphic lines turn blocky after manual stretching. Each individual pixel expands evenly without intelligent filling, leading to rough, unpolished edges viewers notice immediately.
Lost subtle texture detail
Skin tones, fabric weaves, plant foliage and fine graphic gradients fade into smudged blurs. Basic scaling cannot reconstruct tiny visual data points lost in low-resolution source files.
Uneven color banding
Gradients in backgrounds, sky shots and brand graphic palettes break into separate chunky color blocks. This banding effect makes photos look cheap and unrefined for commercial use.
No control over restoration depth
Generic resize tools offer zero customization for texture recovery. Users cannot target soft portrait shots versus sharp product imagery for balanced, natural output quality.
Repetitive rework cycles
Every failed scaled image requires re-editing, cropping and reuploading new source files. This slow workflow cuts into creative time reserved for design, content creation and asset scheduling.
Key Benefits When You Master How to Use Image Upscaler Without Pixelation
Learning how to use image upscaler without pixelation rewrites your entire visual asset workflow, delivering consistent crisp results for every type of digital and print project.
Zero visible pixel distortion after major size increases
Premium upscaling technology reconstructs missing pixel data intelligently. You can multiply image dimensions two, four or even eight times larger without jagged borders or blurry texture loss.
Preserves original artistic intent
Unlike heavy filter tools that over-sharpen and create artificial fake detail, quality upscalers balance restoration and natural rendering. Portraits stay soft, product shots retain crisp definition, and artwork keeps its original style intact.
Cuts asset recreation time drastically
Instead of re-shooting products, redrawing graphics or sourcing new high-res stock photos, you upgrade existing small files in seconds. This eliminates costly reshoots and extra design labor.
Uniform quality across all output formats
Whether you export for social feed thumbnails, large print posters, web landing page hero banners or digital canvas prints, the tool delivers matching crispness without pixelation across every resolution target.
Accessible for all skill levels
You do not need advanced graphic design training to operate reliable upscaling software. The streamlined interface built for casual creators, small business marketers and freelance artists simplifies pixel-free enlargement fully.
Works with all common image file types
Standard photo formats, transparent PNG logos, scanned artwork and compressed mobile snapshots all process smoothly. The tool adapts its restoration algorithm based on the source file’s unique visual structure.
Must-Have Features In An Image Upscaler For Pixel-Free Results
Before fully learning how to use image upscaler without pixelation, you need to identify the core functional features that separate premium lossless upscalers from low-quality basic scaling tools.
Multi-scale enlargement multipliers
Look for adjustable scaling factors ranging from 2x up to 8x original resolution. Different projects demand different size boosts, and flexible multipliers prevent over-enlargement that risks minor artificial texture artifacts.
Targeted texture restoration modes
Separate processing presets for portraits, product photography, line art, landscapes and logos. Each preset tunes the algorithm to recover unique fine details without over-processing and fake pixel patterns.
Edge smoothing anti-pixelation technology
Dedicated edge correction modules soften jagged pixel borders around text and graphic shapes. This single feature is the primary difference between blurry basic resizing and clean upscaled output.
Noise reduction paired with sharpening
Low-resolution source photos often carry digital grain. The best tools balance subtle noise removal with controlled sharpening to avoid combining grain and pixel distortion in final exports.
Real-time preview split comparison
Side-by-side before-and-after panels let you spot pixelation risks mid-process. You can tweak settings instantly instead of exporting full files just to check visual quality.
Custom output resolution lock
Set exact pixel dimension targets instead of only percentage scaling. This lets you match platform-specific size requirements without secondary manual resizing that reintroduces pixel blur.
Transparent background support
Logo and graphic creators rely on PNG transparency preservation. Low-grade upscalers often ruin alpha channels, creating white halo pixel borders around cutout graphics.
Batch bulk image processing
Process dozens of product shots or social visuals in one session. Batch functionality maintains consistent pixel-free standards across an entire library of assets for brand uniformity.
Real-World Use Cases For Pixel-Free Image Upscaling
Once you fully grasp how to use image upscaler without pixelation, you can apply this tool to nearly every visual creation task across creative, commercial and personal content workflows.
E-commerce product listing optimization
Many mobile-shot product photos start at small dimensions unsuitable for store page gallery displays. Upscale each product shot to high resolution without pixelation to build clear, trustworthy shopping visuals for buyers.
Social media content creation
Reuse old mobile snapshots, small graphic memes and vintage artwork for feed posts, stories and cover banners. Pixel-free enlargement lets you repurpose archived visuals without blurry, low-quality uploads.
Print marketing material design
Flyers, wall posters, business signage and event banners require ultra-high resolution source files. Upscale low-res brand logos and campaign imagery to print size while eliminating pixel block distortion.
Portrait and photography editing
Restore old scanned film photos, small profile pictures and event snapshots. The tool recovers facial texture and background detail without creating blocky pixel edges after enlargement.
Digital artwork and illustration refinement
Digital painters, line artists and comic creators often work on small canvas sizes during drafting. Upscale finished illustrations for print collections or high-definition display without pixel blur on linework.
Website and landing page asset upgrades
Web designers frequently inherit old low-resolution brand graphics. Pixel-free upscaling refreshes hero images, icons and page banners to fit modern high-definition screen standards.
Vintage media restoration
Scanned old newspaper clippings, polaroid photos and historical document imagery gain new clarity after upscaling. Intelligent reconstruction removes pixelation while preserving authentic aged visual character.
Step-by-Step Complete Guide: How to Use Image Upscaler Without Pixelation
Follow this structured, beginner-friendly workflow to upscale any photo or graphic and generate fully crisp, pixel-free high-resolution output every single time.
Step 1: Prepare your source image file for processing
Start by selecting your base visual asset. Prioritize uncompressed original files when possible; heavily compressed snapshots carry less raw visual data the upscaler can reconstruct.
Crop the image to remove unnecessary empty background space first. Extra blank canvas forces the tool to waste processing power on empty pixels and can slightly reduce texture restoration performance.
Save a separate copy of your original unedited file to avoid permanent alterations to your source asset during testing and adjustment rounds.
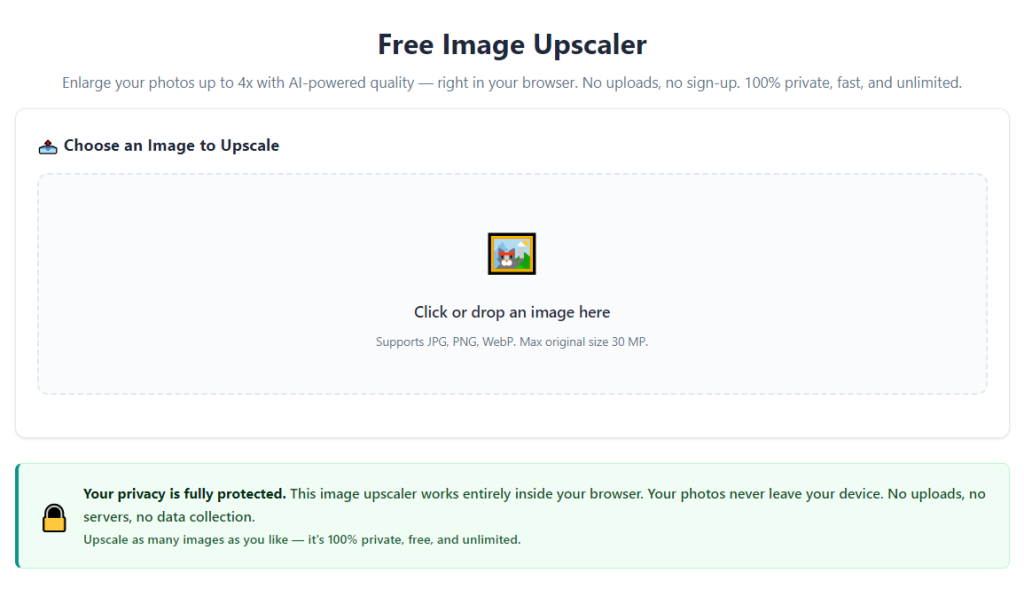
Step 2: Launch the image upscaler tool and review core interface
Open the upscaling platform inside your browser or desktop application. The main workspace will feature an upload zone, preset mode menu, scaling multiplier slider and split preview display.
Spend thirty seconds identifying key control sections: upload panel, category presets, scaling size adjustment, noise reduction toggle and export resolution settings. This cuts confusion during your first processing run.
Confirm the tool has dedicated anti-pixelation edge smoothing functionality visible within its setting menu; tools missing this feature cannot eliminate jagged pixel borders reliably.
Step 3: Upload your prepared source image
Drag and drop your cropped source file directly into the designated upload area, or use the file browse button to select the asset from your device storage.
Wait for full file loading before adjusting any scaling parameters. Partial uploads create incomplete visual data and lead to inconsistent pixelation artifacts in finished output files.
Double-check the preview panel to confirm the uploaded image displays correctly with no broken transparency or distorted initial rendering.
Step 4: Select the matching content category preset
Choose a preset tailored to your image type to activate specialized anti-pixelation algorithms. Available standard categories include product photography, human portraits, line art, landscape shots and brand logos.
Logo and graphic presets prioritize hard-edge smoothing to eliminate blocky pixel borders around text and vector-style shapes. Portrait modes soften skin texture while avoiding artificial pixel grain after enlargement.
Avoid generic “all-purpose” default modes for specialized visuals; these universal settings fail to target unique texture structures and leave subtle pixel distortion visible.
Step 5: Set your target scaling multiplier and resolution limits
Adjust the scaling slider to your desired enlargement level. Stick to 2x or 4x multipliers for most everyday projects; 6x to 8x scaling works only for high-quality uncompressed source files with rich original detail.
Input exact pixel width and height targets if you have specific dimension requirements for print or web layouts. Locking resolution prevents accidental over-scaling that introduces minor pixel blur.
Balance your multiplier choice with the source file quality. Tiny heavily compressed mobile photos risk faint pixel artifacts at 8x scaling even with premium anti-pixelation processing enabled.
Step 6: Activate anti-pixelation edge smoothing and noise correction
Locate the edge smoothing toggle and enable this core feature—this setting directly eliminates jagged pixel borders that appear from basic raw image stretching.
Tweak noise reduction intensity based on your source file condition. Grainy old scanned photos need moderate noise removal, while crisp new product shots require minimal noise adjustment.
Leave sharpening strength at a balanced mid-range value. Over-maxed sharpening creates fake artificial pixel patterns that mimic the exact blur you want to avoid entirely.
Step 7: Generate a preview split comparison to spot pixel risks
Initiate a quick low-resolution test render to populate the split before-and-after preview window. Scan the right-hand processed panel closely for any blocky pixel edges or smudged texture blur.
Zoom into fine detail zones like text, facial features, fabric weaves or graphic outlines. These high-detail areas show early signs of pixelation if your settings are misaligned.
If jagged pixel borders appear, increase edge smoothing intensity slightly and run a second preview test to compare improvements instantly.
Step 8: Adjust settings iteratively to remove all visible pixel distortion
If preview output still carries faint pixel blockiness, lower your scaling multiplier one level first. Excessive enlargement is the most common root cause of residual pixelation artifacts.
Swap your content category preset if texture looks unnatural. For example, switching from landscape mode to product mode sharpens graphic borders and removes fuzzy pixel smudging on logos.
Reduce noise reduction strength if fine details turn mushy; over-aggressive grain removal erases subtle texture and creates a blurry pseudo-pixel effect on close inspection.
Repeat preview renders after every small setting tweak until the processed side of the split panel shows zero jagged pixel edges or smudged texture loss.
Step 9: Run full high-resolution upscaling processing
Once your preview passes visual inspection with no pixelation visible across all zoom levels, trigger the full-size render command to generate your final high-resolution asset.
Longer scaling multipliers and large file sizes require extra processing time. Allow the tool to finish its full reconstruction cycle without closing the window mid-render.
The algorithm reconstructs missing pixel data line by line, applying anti-pixelation edge correction and targeted texture restoration simultaneously throughout the full canvas.
Step 10: Review finished output file one final time
Once rendering completes, open the exported preview and zoom across every section of the image. Pay extra attention to text borders, thin graphic lines and delicate fine textures prone to pixel blur.
If isolated sections still show minor pixel distortion, note your current settings and reprocess a new copy with adjusted smoothing and scaling values for a cleaner second version.
Keep both test renders saved so you can reference ideal setting combinations for matching future image batches of the same visual category.
Step 11: Export in a high-quality lossless file format
Select an export format that preserves all restored detail and anti-pixelation processing work. Lossless formats are recommended for print and professional design use.
Avoid heavily compressed formats for commercial assets; repeated compression after upscaling reintroduces blocky pixel artifacts into your newly crisp high-resolution file.
Adjust export quality sliders to maximum percentage values to lock in all restored texture data and smooth edge work from the upscaling algorithm.
Step 12: Organize finished pixel-free assets for ongoing use
Label each exported file with its scaling multiplier and preset settings for future reference. This cuts trial-and-error adjustment time when processing matching batches of visuals later.
Store original source files and fully upscaled high-res copies in separate folders to avoid accidentally reusing unprocessed low-resolution base images for new projects.
Common Mistakes To Avoid When Using Image Upscaler Without Pixelation
Even when you fully understand how to use image upscaler without pixelation, these frequent user errors introduce avoidable pixel blur and ruin final visual quality.
Using heavily compressed low-quality source files
Photos saved multiple times in lossy formats lose critical raw pixel data. No amount of anti-pixelation processing can fully reconstruct detail erased by repeated compression cycles. Always start with uncompressed original assets where possible.
Skipping category preset selection and relying on generic mode
Universal default processing does not tailor edge smoothing and texture restoration to your image type. Logos, portraits and artwork each require unique algorithm tuning to eliminate pixelation effectively.
Over-scaling small low-detail source images
Pushing tiny snapshots to 8x enlargement overwhelms the reconstruction algorithm. Missing visual data cannot be created out of thin air, leading to faint blocky pixel patterns across the full frame.
Disabling edge smoothing to speed up rendering
Edge correction is the primary feature that removes jagged pixel borders. Turning this setting off defeats the core purpose of learning how to use image upscaler without pixelation entirely.
Over-applying sharpening and noise reduction
Maxed sharpening creates artificial fake pixel grain that looks identical to standard resizing blur. Excessive noise removal washes out fine texture and creates a blurry, pixel-masked flat appearance.
Cropping after upscaling instead of before
Upscaling empty blank background space wastes processing power and distorts proportional texture restoration. Crop all unneeded canvas area before uploading to maintain consistent anti-pixelation results.
Exporting with heavy compression after upscaling
Restored crisp detail disappears instantly under aggressive file compression. Save finished upscaled visuals in lossless formats to lock in smooth pixel-free edges and fine texture.
Bulk processing mismatched image categories in one batch
Running logos, portraits and landscape photos together under one preset creates inconsistent pixelation across your asset library. Separate batches by visual type for uniform clean output.
Pro Tips To Get Perfect Pixel-Free Upscaling Results
Implement these actionable expert tactics to maximize performance every time you learn and apply how to use image upscaler without pixelation for all your creative and commercial visuals.
- Always archive uncompressed original source files before any upscaling work; this gives you a clean base to reprocess assets if your first setting test creates minor pixel distortion.
- Create saved setting templates for your most frequent image types (product shots, social graphics, scanned art) to skip repetitive slider adjustments during bulk processing sessions.
- Zoom to 100% native pixel view during split previews—small on-screen thumbnail views hide subtle jagged pixel borders that only become obvious at full resolution.
- Mix moderate scaling multipliers with targeted cropping instead of maximum 8x enlargement for small source photos to limit potential pixel artifact formation.
- Pair upscaled pixel-free visuals with matching soft background gradients in design layouts; harsh contrasting backdrops draw viewer eyes to tiny residual pixel imperfections.
- Schedule batch image processing during off-work hours for large asset libraries; longer render times for multi-file batches do not disrupt your active creative workflow.
- Test one sample image from a new batch first before bulk uploading dozens of files. Fix pixelation issues on the sample to standardize settings for the entire group of visuals.
- Avoid re-upscaling already upscaled files; double processing amplifies faint artificial texture patterns that mimic pixel blur in final exports.
Final Thoughts
Clear, crisp high-resolution imagery stands apart from blurry pixelated visuals across every digital platform and print medium. Manual image stretching and basic resize tools consistently fail to deliver clean enlargement results for creators and business marketers.
Mastering how to use image upscaler without pixelation eliminates the recurring stress of blurry assets, wasted rework and costly visual reshoots. Purpose-built upscaling algorithms with dedicated anti-pixelation edge smoothing reconstruct missing visual data intelligently, preserving natural texture and sharp borders at enlarged dimensions.
This tool fits every creator profile, from casual social media hobbyists and student designers to full-time e-commerce marketers and professional print artists. Its customizable presets, adjustable scaling multipliers and split preview controls remove guesswork from every enlargement task.
By following the complete step-by-step workflow, avoiding common pixelation-causing mistakes and applying the professional optimization tips outlined above, you can consistently generate flawless, high-resolution visuals free of jagged pixel distortion for every creative project you develop.
After learning the operation method, click the link below to enter the tool page for immediate use.